The Document! X and HelpStudio Bundle allows you to capture the images to your content within the Topics. It supports the image file formats that includes JPG, JPEG, PNG, TIFF, TIFF, BMP, and GIF. You can also add animated GIFs to content files, just as you add a regular image.
The below section explains how to capture an image in Document! X and HelpStudio Bundle project topics.
Capture an image
To capture an image.
- Select the Capture Image button in the Project ribbon menu.
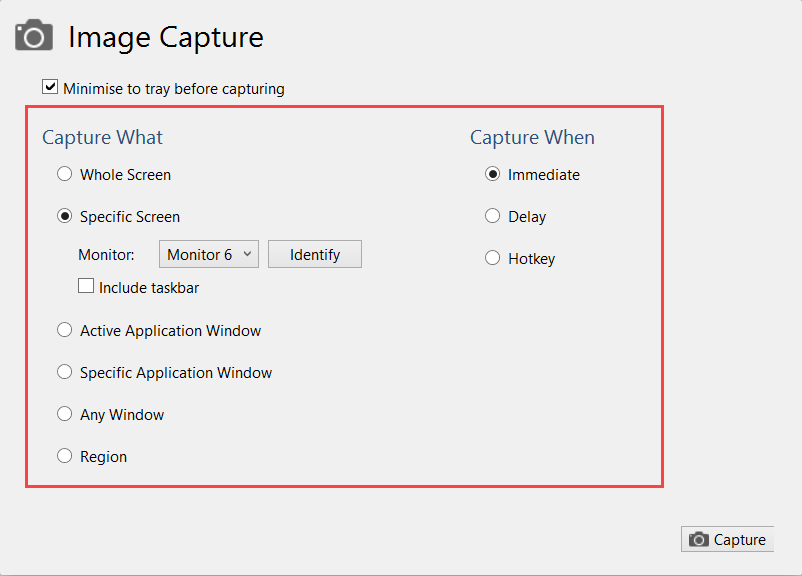
Image Capture dialog box appears.

- Select the required options and click Capture.
The Image Capture dialog box allows you to choose when the capture will take place (immediate, after a specified delay, or on a defined hotkey) and what the capture target is (whole screen, specific window, specific region etc).
- Select on the Save button to save the captured image and complete the capture process.
After capturing an image a preview will be displayed and options to change the filename, create a thumbnail, add a drop shadow and add the image to the currently open project.
Define region to capture an image
To define a region.
- Select the Capture Image button in the Project ribbon menu.
- In the Image Capture dialog box, select Region.
- Select the Define button.
A red-bordered rectangle will be displayed that represents the region that will be captured. You can change this region by holding down the left mouse button on the red circle in the center of the region and by dragging it. You can also resize the region by any of its sides or corners.
The region selection can be confirmed by double clicking on the red circle in the center, or cancelled by pressing the Escape key.
-
Now, select the Capture button in the Image Capture dialog box to capture the specified region.