Disqus is an increasingly popular choice for adding discussion and community features to web content.
Setting up Disqus for Community Features
To enable Community Features using Disqus, you must first register a "Site" with Disqus that uniquely identifies the content you will be using Disqus Community Features in and then configure the settings on the Community Features page in the Build Profile Editor.
Register a Site on Disqus
- Open the Build Profile Editor and select the Community Features page.
- Select the Include Community Features option.
- Select Disqus from the Community Provider dropdown.
- Under the Settings heading, click the Create New button (or visit https://disqus.com/admin/signup/). If you already have a Disqus account you wish to use, select the Log in tab, otherwise select the Sign Up tab and complete the Disqus sign up process.
- Once you are logged in, the What would you like to do with Disqus page displays:
- Click the I want to install Disqus on my site button. The Create a new site page displays:
- Choose a Website Name to identify your documentation project. The name you choose is used as the first part of the Disqus URL that identifies your documentation, so choose a name that is descriptive of your documentation content. This must be a unique name across sites using Disqus so you may wish to prefix with your company name, e.g. "fabrikam-documentation".
You may wish to click the Customize Your URL link below the Website Name field - this allows you to specify a Website Name and Disqus URL Shortname separately. This is a useful option as you can make your Website Name descriptive, but choose a short name without spaces for use in the Diqus URL.
- Click the Create Site button to complete your Disqus Site Registration. You are then taken to a Select a plan page:
- Select the plan you wish to use.
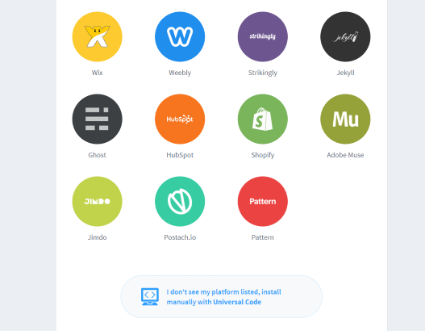
- Once you have selected a plan, the What platform is your site on? page displays:
- Scroll to the bottom of the page and click the I don't see my platform listed, install manually with Universal Code button. This takes you to a setup instructions page; the instructions themselves are not needed as the integration is managed automatically once you have configured your project to use Disqus for Community Features.
Configure the Build Profile to use Disqus for Community Features
- Open the Build Profile Editor and select the Community Features page.
- Ensure that the Include Community Features option is selected.
- Ensure that Disqus is selected from the Community Provider dropdown.
- Under the Content Publishing URL section, identify the location to which your content will be published. If you are using Publishing features you can select from an existing Publishing Target, otherwise type the URL into the Use this specific URL\Content URL field.
- Type or paste your Disqus Site URL into the Disqus URL field (see Register a Site on Disqus section above).
Managing Community Content
Once your project has been configured for Community Features, the Moderate Content and Manage Settings are enabled on the Community Features page in the Build Profile Editor. Those buttons launch a browser that takes you to the correct page on your chosen Community Provider's website.
Once you have Built and Published your project after configuring the Community Features page, you will also be able to view and manage community content directly within the Topic Editor and Content File Editor and directly in the generated output.
